

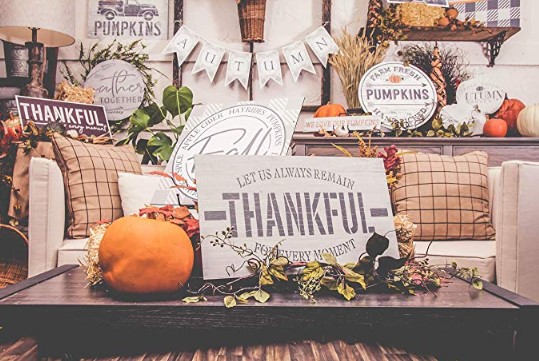
Adding rustic touches to my home décor with a wood sign board has always been on my to-do-list, as rustic style is absolutely on-trend for today’s interiors.
In this post, I want to share with you the simple steps and quick tips on how to make a wood sign on a budget.
I’ll go through how to make a wood sign, how to make wooden signs with quotes. I’ll also go over a step-by-step tutorial about how to make a wooden sign for outdoors with and without stencils.
Ready? Let’s dive in.
Content:
- Materials checklist for making a wood sign
- Detailed steps to make custom wood signs
- Extra solutions to make your own wood sign (without stencil)
- FAQs About Making Wood Signs
How to Make Wood Signs with Stencils: Supplies to Start With
Begin by getting all the material you’ll need for making custom wood signs:
- Wood board
- Sandpaper
- Wood stain
- Paintbrushes
- Stencil
Basically, to make primitive wood signs, you’ll need a wood board as custom wood sign canvas, sandpaper to prepare the wood for staining, wood stain and paintbrushes for wood sign painting, and stencils to make wooden signs with quotes.
In my project to make primitive wood signs, I use a plywood board at the size of 16×24. You can choose any type of wood for the wood sign carving project based on your preference.
How to Make a Wood Sign: Step-by-Step Guide
Step 1. Sand the Wood Board Before Wood Sign Painting
Sanding is a wood surface preparation step which is very likely to be overlooked. Many tend to believe that bare wood is naturally ready-to-go. However, it’s a crucial step to ensure the quality and uniformity of finished wood signs for home.
When you have your wood board customized to the size you want, sand the wood board with a piece of sandpaper till the surface and edges become smooth.
Step 2. Prime the Bare Wood Sign Board with Primer (Optional)
Bare, untreated wood should be primed prior to staining or painting, because some unfinished bare wood might absorb paint very unevenly. And the paint could highlight the wood grain, especially around knots, and give the custom wood sign an uneven and flawed look.
Priming the wood sign board does much more than providing a base coat to the bare wood. It will fill the wood grain, seal the knots, and creates a smoother layer that paint can better adhere to.
Apply the primer to the wood board with a brush, and allow the wood board to sit and dry for 1-2 full days.
Step 3. Paint the Wood Sign Board
Now it’s time to pick the color for your wood signs for home. I use the Roasted Chestnut color for my custom wood sign background. Apply one or two coats all over the wood signs for home, and let it dry completely.
Two thin coats of paint are more likely to save you time and energy than one heavy coat. And you’ll want to sand the wood sign board between coat to achieve a smoother finish.
If you want to make your new wood sign board look old, read this post!
Editor’s tip: When painting your wood sign board with a brush, don’t load the paint brush with too much paint. And to give the wood sign board a better finish, paint with the grain in one direction, from edge to edge.
Step 4. Apply the Stencils to Make Your Own Wood Sign
I get this ready-made stencil with the quote “Remain Thankful for Every Moment” by StudioR12 for my wood sign painting project.
When the paint is completely dry, position your stencils on the wood sign board, and hold it still in place with hands, or simply with painter’s tape, so it won’t shift or move when you paint them.
Step 5. Paint the Stencils to Make Custom Wood Signs
When the stencils are placed where you want it on the wood sign board, lightly dab the paint all over your stencils. In this step, I use a wax paint brush with the all-white paint for stencil painting.
You’ll want a slight amount of paint on your brush every time you dab the paint onto your stencils. If there is too much paint on the brush, be sure to dab the excess off the brush first.
Done and done! Now you can remove the stencil from the wood sign board. Let it dry for some time and hang it up!
How to Make a Wood Sign Without Stencils: Extra Solutions to Make Custom Wood Signs
Custom-made stencils can be costly. If you’re wondering how to write on wood sign without using stencils, or how to print on wood sign without high-tech machines, continue reading!
We’ve rounded up some extra solutions on how to make a wood sign without stencils. These approaches will take you a bit more time, but certainly will save you a bunch.
Solution 1: Make Custom Wood Signs with Chalk
Don’t freak out already. This is easier than you think! The video below will show you how to make a wood sign using handy chalk stencil technique:
Detailed steps to make primitive wood signs using handy chalk stencil technique:
· Design the graphic for outdoor wood sign on your PC and print it out.
· Turn your printed design over and heavily shade over the outline of the design with chalks.
· Flip the paper back over and position it on top of the wood sign board.
· Go over the design with a pen to transfer the design outline onto the wood sign board.
· Remove the paper and you’ll see that the design is transferred onto the wood.
· Now you can use a paint brush to do the wood sign painting.
Solution 2: Make Custom Wood Signs with a Router
A possible and feasible to make custom engraved wood signs is to do wood sign carving with routers. Follow the video below and learn how to make a wood sign with a router:
Detail steps on how to make a wood sign with a router:
· Have your design transferred to the wood sign board.
· Place the wooden sign on your workbench and do the routing.
· Paint your letters or spray the stain all over it and sand down what you don’t need.
FAQs on How to Make a Wood Sign
Making custom wood signs can be a challenge for wood sign carving and wood sign painting beginners. We have collected some of the most frequently asked questions concerning how to make a wood sign and offered our solutions as followed.
1. How to weatherproof a wooden sign for outdoors?
After the wood sign painting and allowing the paint to dry completely, apply wood sealer to the wood sign board with a clean paintbrush.
To enhance the outcomes, you will want to apply at least two coats of the sealer all over the surface, and allow it to dry in between.
Even the best finishes wear down over time when being exposed to sun and rain. If possible, recoat the DIY wood signs for outdoors in one or two years.
2. How to prevent the custom wood signs rot?
If you want to protect your outdoor wood sign and have it last for decades, these simple techniques will help.
Use rot-resistant wood for your outdoor custom wood sign project. Black locust, teak, cypress, American mahogany and other naturally rot-resistant woods are commonly used in outdoor wood sign projects.
Make sure to paint and seal all sides of the wood piece before putting it up. Repaint and recoat the custom wood signs if paint is cracking or peeling.
Click here, you will find some great info about wood sealer and stain!
Share Your Ideas!
Do you have any other questions concerning how to make a wood sign board? Are you going to make your own wood sign with stencils or without stencils? Let us know in the comments!